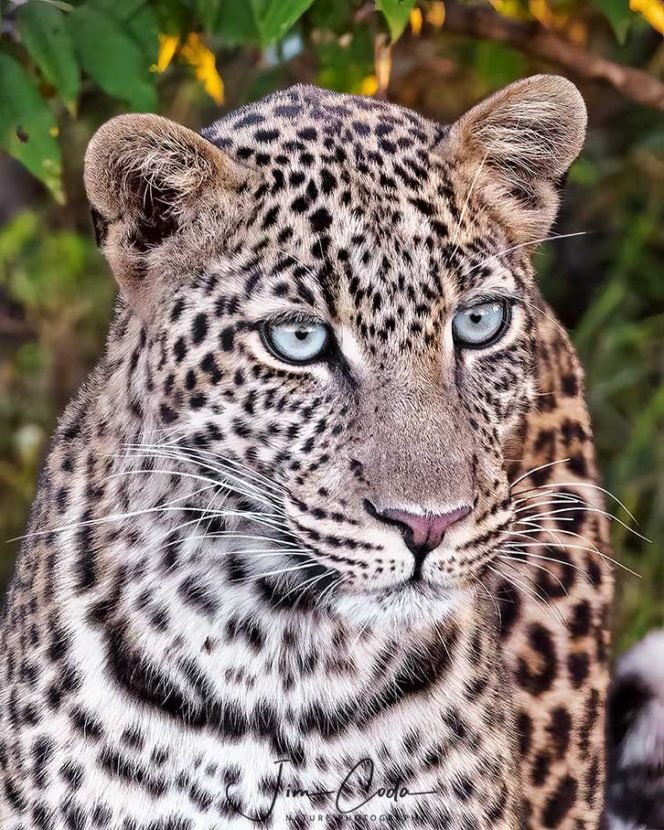
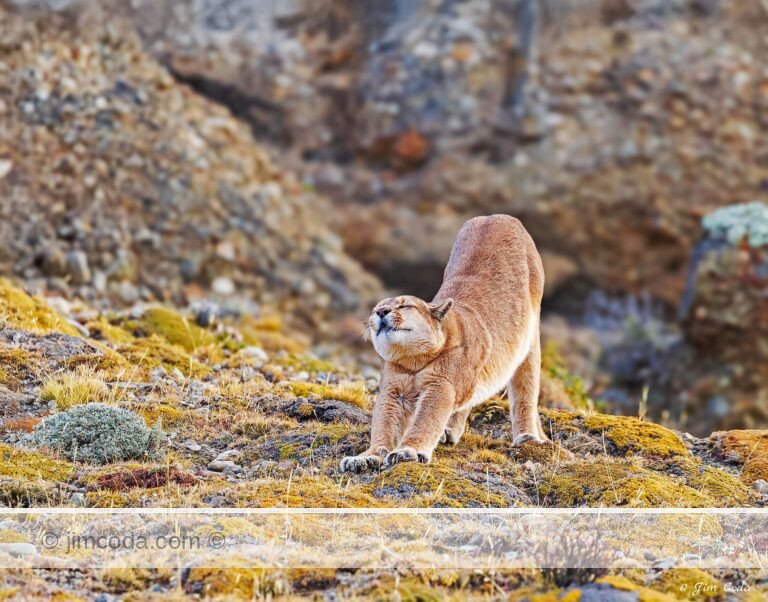
I photographed this leopard just as she was coming out of an area of trees and thick brush. A river runs through it. Of the three females and one male leopard I photographed in my eight days in the Ol Kinyei and Olare Motorogi Conservancies, she was my favorite because she gave me the most opportunities for photographing a leopard. My guide, George Letoluo, and I followed her as she walked along the river on the outer edge of the vegetation and, after a while, she re-entered the vegetation. Fortunately, it was more open than where we first spotted her. At that point she stopped for several minutes and posed, beautifully, on a fallen tree. It was one of the best photo ops I’ve ever had. George later told me they call her “Kini” which means small in Swahili.
As I looked at this photo I remembered that some leopards have blue eyes. I saw a TV nature show that had a blue-eyed leopard in it. Then I got to thinking, how would this leopard look with blue eyes? So, I decided to see. First, I had to get on the internet and see exactly what shade or hue of blue those blue-eyed leopards have. Then, I had to refresh my memory on how to change colors in Photoshop. Another trip to the internet. There are a few different ways to do it. Each has its strengths and weaknesses. The one I chose is Hue/Saturation. It’s fairly simple and in case anyone is interested, here’s how it works.
CHANGING A COLOR IN A PHOTO
First, click on the black and white “cookie” at the bottom of the layers panel in photoshop and then click on Hue/Saturation.
Second, in H/S click on “Master” in the drop-down menu and choose a color below it that seems closest to the color you want to change. For the leopard’s eyes I chose yellow. Master is not a choice as it changes all colors at once.
Third, grab the left-most eyedropper in H/S and click once on the color you want to change, namely the leopard’s golden eyes in my case.
Fourth, now move the hue slider with your mouse. Go slow or you’ll go past the color you want. When you do that notice how it affects the two parallel color bars. The top bar reflects the color you want to change, and the lower one the color you want the current color to change to. In my case yellow and blue respectively. I wish Adobe would allow using the arrow keys to move the slider in small increments.
Fifth, you’re almost done. But you will probably notice that you have affected some other areas of your photo with your new color. Several spots in my leopard photo turned somewhat blue. If so, grab the brush tool from the tool panel (or tap the “b” key) and paint with black over the photo where you don’t want your replacement color showing. If nothing is happening, make sure that in your tools panel that black is the top color, not white. The quick way to go from black to white and white to black is by tapping the “x” key. Sometimes that new color will be very subtle, so it’s best to paint over every square inch of the photo, except where you want your chosen color to show. (Confession: after I finished, I noticed I missed painting a faint blue area under her right jaw with black.)
That’s all there is to it. The thing I like most about it is that with Hue/Saturation, unlike some other methods, you don’t have to fuss with little corrections of what is selected like I always have to do when using the object selection or quick selection tools. I’ve sometimes wondered if a pen tablet or pen display would make that fussy work easier.
Anyway, without further ado, here’s my blue-eyed leopard.